

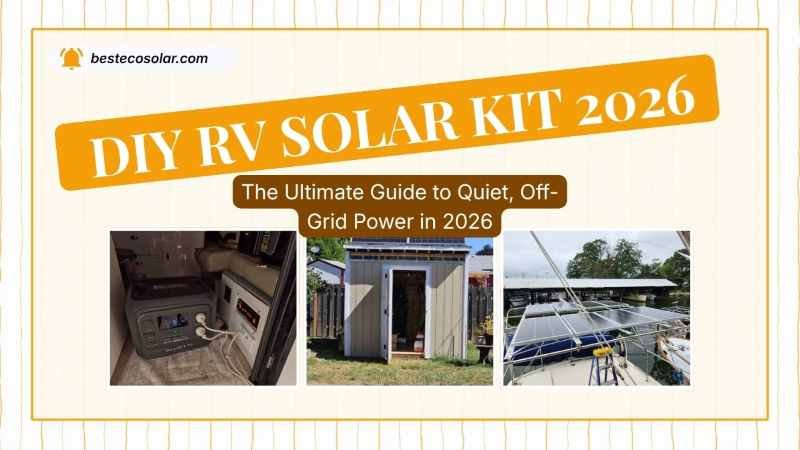
DIY RV Solar Kit: The Ultimate Guide to Quiet, Off-Grid Power in 2026
That’s the magic of a DIY RV solar kit. And the best part? You don’t need to be an electrician or spend a fortune at an RV dealership to make it happen. If you can follow instructions, use a screwdriver, and read a wiring diagram (we’ll help with that), you can build your own solar setup — and probably have fun doing it.
DIY RV Solar Kit – In this guide, we’re breaking down everything you need to know about building, choosing, and installing your own RV solar system in 2026. Whether you’re a weekend warrior or a full-time boondocker, there’s a solar solution for you. Let’s dive in.
Why You Should Absolutely Consider a DIY RV Solar Kit
Before we even pick up a tool, let’s talk about the “why.” Why should you spend a weekend (or two) on your hands and knees, drilling holes in your roof and crimping wires? The answer is multifaceted, and it’s all in your favor.
 First and foremost, it’s the cost. You’re looking at a significant reduction in your investment. A pre-made portable solar power station with a decent amount of capacity can easily run you over a grand. With a DIY approach, you’re essentially paying for the components, not someone else’s labor. You’re the project manager, the electrician, and the installer all rolled into one, and that means the savings go straight back into your adventure fund.
Beyond the money, there’s the incredible power of customization. Your RV is unique, and so is the way you travel. Maybe you’re a weekend warrior who just needs to keep the batteries topped off for the fridge and a few lights.
Or perhaps you’re a full-timer who wants to run a microwave, a coffee maker, and even the air conditioner for short bursts. An off-the-shelf, one-size-fits-all system is a compromise. A custom DIY RV solar kit is tailored to your exact needs and your rig’s specific quirks.
Finally, there’s the unmatched satisfaction of self-reliance. When you build it yourself, you understand it intimately. If a fuse blows or a connection gets loose on a bumpy back road, you won’t be stuck waiting for a service appointment.
You’ll know exactly where to look because you put every piece in place. That peace of mind, knowing you can fix your own power plant, is worth more than any warranty.
What Is a DIY RV Solar Kit?
A DIY RV solar kit is essentially a package (or a collection of components you assemble yourself) that converts sunlight into usable electricity for your recreational vehicle. Think of it like building your own mini power plant on wheels.
Unlike buying a pre-wired, plug-and-play RV from a dealer, a DIY approach means you pick the components, install them yourself, and customize everything to match your actual power needs. It’s like cooking a meal from scratch instead of ordering takeout — more effort, but way more satisfying (and cheaper).
A typical DIY solar kit includes:
- Solar panels
- A charge controller (MPPT or PWM)
- A battery bank (AGM, lithium, or gel)
- An inverter (if you need AC power)
- Wiring, fuses, and connectors
- Mounting hardware
Understanding Your Power Needs: The Essential First Step
Okay, I’m going to hit you with a hard truth: before you buy a single solar panel, you need to become an energy detective. The single biggest mistake people make is buying a system that’s either way too small (and ends up being useless) or way too big (and wastes a ton of money). We’re aiming for the Goldilocks zone: just right.
Start by conducting an RV energy audit. Grab a notebook or open a spreadsheet and list every single appliance and device you plan to run on solar. We’re talking the fridge, lights, water pump, laptop, phone chargers, vent fans, TV, and maybe that beloved coffee maker.
Next, find out the wattage of each item. This is usually listed on the device’s label or power brick. For things like a fridge, look for the running wattage, not just the startup surge. Then, estimate how many hours per day you’ll use each item. Multiply the watts by the hours to get watt-hours (Wh). For example, a 60W light used for 4 hours consumes 240 Wh.
Now, add all those watt-hours up. This is your total daily energy consumption. But wait, we’re not done! The system isn’t 100% efficient. Inverters, which turn battery DC power into household AC power, have a conversion loss of about 10-15%. Always add a 20-30% buffer to your total to account for these inefficiencies and those inevitable cloudy days. This final number is your holy grail—it’s the target you’ll use to size your entire system.
The Anatomy of a DIY RV Solar Kit: Core Components
Think of your solar system as a living, breathing organism. Each part has a specific, vital role to play. Here’s a quick breakdown of the key players:
| Component | What It Does | Analogy |
|---|---|---|
| Solar Panels | Captures sunlight and converts it into DC electricity. | The system’s “lungs” breathe in energy from the sun. |
| Charge Controller | Regulates the voltage and current coming from the panels to prevent overcharging the battery. | The “brain” ensures the battery gets a safe, steady flow of power. |
| Battery Bank | Stores the electricity generated by the panels for use when the sun isn’t shining. | The “stomach” stores energy for later use. |
| Inverter | Converts the stored DC power from the battery into standard AC power for household appliances. | The “translator” allows your 12V battery to talk to 120V appliances. |
Now, let’s dive deeper into how to choose the right parts for your DIY masterpiece.


Solar Panels: The Lungs of Your System
Your solar panels are the workhorses that collect all that free sunshine. To figure out how much solar you need, you’ll use this simple formula:
Total Daily Energy Need (Wh) / Average Peak Sun Hours = Minimum Solar Array Size (W)
“Peak sun hours” isn’t just the hours of daylight; it’s the number of hours per day when the sun is strong enough (averaging 1000 watts per square meter) to generate your panel’s full rated power. This varies wildly. You might get 5.5 peak hours in sunny Arizona in summer, but only 2 in the cloudy Pacific Northwest in winter.
If you want year-round capability, size for your worst-case scenario. Due to factors like panel angle and temperature, it’s also wise to oversize your array by another 20-25%.
Now, which type of panel is right for you? Here’s a side-by-side look at the two most common options for RV roofs:
| Feature | Rigid Monocrystalline Panels | Flexible Panels |
|---|---|---|
| Efficiency | High (20-23%+) | Slightly Lower (16-20%) |
| Weight | Heavier (e.g., ~24 lbs for a 200W panel) | Very Lightweight (e.g., ~11 lbs for a 200W panel) |
| Durability & Lifespan | Excellent, typically 25+ years | Good, but can be more prone to micro-cracking over time |
| Cost | Generally more cost-effective per watt | Typically more expensive per watt |
| Installation | Requires mounting brackets and drilling into the roof | Can be glued or taped down, conforms to curved roofs |
| Heat Dissipation | Better airflow underneath for cooling and efficiency | Lies flat, can run hotter, slightly reducing output |
| Best For | Flat or gently curved roofs, permanent installations | Curved fiberglass roofs, stealth camping, where a low profile is desired |
For most RV solar panel installations, monocrystalline panels are the gold standard. They’re more efficient, meaning you get more power per square foot of roof space. If your RV roof is small, efficiency matters more than price.
Charge Controllers: The Brain of the Operation
Think of your charge controller as the bouncer at an exclusive club for your battery. It makes sure the power coming from your panels isn’t too much or too wild, protecting your expensive battery from being overcharged and destroyed.
You’ll encounter two types: PWM (Pulse Width Modulation) and MPPT (Maximum Power Point Tracking). PWM is the old-school, budget-friendly bouncer. It works, but it’s not very smart. MPPT is the highly trained, elite bouncer.
It’s significantly more efficient—up to 30% more—because it can take excess voltage from the panels and convert it into usable amperage for your battery. For a modern lithium battery setup, an MPPT charge controller for RV systems is the only way to go. It maximizes every watt of precious sunshine.
Picking the Best Charge Controller: MPPT vs. PWM
Think of the charge controller as the brain of your off-grid RV power system. It regulates the voltage coming from your solar panels so your batteries don’t get fried.
- PWM (Pulse Width Modulation)
PWM controllers are cheaper and simpler. They work best when your panel voltage closely matches your battery voltage. Great for small, budget-conscious systems under 200W. - MPPT (Maximum Power Point Tracking)
MPPT controllers are the smarter, more efficient option — they can be up to 30% more efficient than PWM. They’re ideal for larger systems, cold climates, and when your panel voltage is significantly higher than your battery voltage.
Our recommendation: Go with an MPPT controller whenever possible, especially for systems over 200W. The Victron SmartSolar 100/30 and Renogy Rover 40A are both excellent choices in 2026.


Batteries: The Heart That Keeps Everything Running
Your battery bank is like the gas tank of your solar system — it stores all the energy your panels collect for use when the sun isn’t shining.
- AGM Batteries — The Reliable Workhorse
Absorbed Glass Mat (AGM) batteries are sealed, maintenance-free, and more affordable than lithium. They’re a solid choice for weekend campers or those on a tight budget. However, you should only discharge them to about 50% of their capacity, which effectively halves their usable storage. - Lithium Iron Phosphate (LiFePO4) — The Gold Standard
LiFePO4 batteries are the real game-changer for full-time RV solar setups. They’re lighter, last 5–10x longer than AGM, can be discharged to 80–100% without damage, and charge faster. Yes, they cost more upfront — but over a 10-year period, they’re often cheaper.
If the panels are the lungs and the controller is the brain, the battery is the heart of your system, pumping power day and night. And just like with the charge controller, there’s a clear winner for RVs: Lithium Iron Phosphate (LiFePO4) batteries. Forget about those heavy, old-school lead-acid batteries.
LiFePO4 is lighter, lasts 5-10 times longer (3000-6000 cycles!), and allows you to use almost all of its stored energy without damage. For the same usable power, you need a much smaller and lighter lithium battery. A 100Ah LiFePO4 battery is a fantastic starting point for many RVs, providing about 1280Wh of usable energy.

Inverters: The Necessary Translator
Your battery stores power as 12V DC (direct current). Your laptop, coffee maker, and TV want 120V AC (alternating current). The inverter is the translator that bridges this gap. When choosing one, look for a “pure sine wave inverter.” These produce a smooth, clean flow of power that’s safe for sensitive electronics like laptops.
Modified sine wave inverters are cheaper but can be noisy and may damage some devices. Size your inverter based on the peak power you’ll draw at any one time (e.g., the startup surge of your microwave plus a few other things running).
The Nuts and Bolts: Wiring Your DIY RV Solar Kit
This is where a lot of people get nervous, but it’s just like following a recipe. The most important decision you’ll make is how to wire your panels: in series or parallel.
- Series Wiring: You connect the positive of one panel to the negative of the next. This adds up the voltage while keeping the current (amps) the same. This is great for long cable runs from the roof to the controller because it minimizes voltage drop. However, it’s more sensitive to shade; if one panel is partially shaded, it can reduce the output of the entire string.
- Parallel Wiring: You connect all the positives together and all the negatives together. This adds up the current while keeping the voltage the same. This configuration is much more tolerant of shade—if one panel is shaded, the others keep chugging along at full power.
- Series-Parallel Combo: This is the sweet spot for many RVs. You wire sets of panels in series and then connect those sets in parallel. It gives you a beautiful balance of higher voltage (for efficient transmission) and shade tolerance.
Always use high-quality, UV-resistant wiring like 10AWG or 8AWG, and for the love of all things holy, install a fuse between the battery and the charge controller.
Key Wiring Tips
- Use the correct wire gauge. Undersized wires are a fire hazard. Use an online wire gauge calculator based on amperage and cable length.
- Add fuses or circuit breakers between every major component — especially between the battery and the inverter.
- Use marine-grade or tinned copper wire for durability, especially in humid environments.
- Color code your wiring: Red for positive, black for negative. Always.
DIY RV Solar Kit Installation: A Step-by-Step Guide
Alright, you’ve got all your components. Now comes the fun part—putting it all together. Don’t be intimidated; millions of people just like you have done this successfully.


- Step 1: Plan Your Layout
Before you even touch a tool, get up on the roof and survey your kingdom. Identify large, unobstructed areas that receive maximum sunlight. Avoid placing panels where they’ll be shaded by roof vents, the air conditioner, or a satellite dish. Use blue painter’s tape to outline where each panel and its mounting brackets will go. - Step 2: Mount the Panels
This varies depending on whether you chose rigid or flexible panels. For rigid panels, you’ll attach mounting brackets (often Z-brackets) to the panel’s frame, then position them on your roof layout, mark the drill holes, and drill pilot holes into the roof. This is the only part that requires drilling into your RV, so take your time and use plenty of lap sealant like Dicor on every single hole and screw to prevent leaks. - Step 3: Run the Wiring
Now, you need to get the wires from the panels to the inside of your RV. Many people use the existing refrigerator vent on the roof to drop the wires down. Others use a waterproof cable entry gland (a special housing) and drill a new hole through the roof, sealing it thoroughly. Use a multimeter to check the polarity of your wires. - Step 4: Connect to the Charge Controller
Mount your MPPT charge controller in a convenient interior location, ideally close to your battery bank. Connect the wires from the solar panels to the “PV Input” terminals on the controller, paying close attention to positive and negative polarity. - Step 5: Connect to the Battery
Finally, connect the “Battery Output” terminals on the charge controller to your battery bank, again being absolutely certain about the polarity. Always connect the battery to the controller first before connecting the solar panels. This allows the controller to recognize the battery’s voltage. Then, connect the inverter to the battery using thick, high-quality cables.
Understanding Your Power Needs First
Before you buy a single solar panel, you need to know how much power you actually use. This is the step most beginners skip — and it leads to undersized or oversized systems. Calculate your daily need.
How to Calculate Your Daily Power Consumption
Here’s a simple formula: Watts × Hours Used Per Day = Watt-Hours (Wh)
| Appliance | Watts | Hours/Day | Daily Wh |
|---|---|---|---|
| LED Lights | 10W | 4 hrs | 40 Wh |
| Laptop | 60W | 4 hrs | 240 Wh |
| 12V Mini Fridge | 45W | 24 hrs | 1,080 Wh |
| Phone Charger | 10W | 2 hrs | 20 Wh |
| CPAP Machine | 30W | 8 hrs | 240 Wh |
| Water Pump | 60W | 0.5 hrs | 30 Wh |
| Total | 1,650 Wh/day |
In this example, you’d need roughly 1,650 watt-hours per day. With 5 peak sun hours, you’d need at least 330 watts of solar panels — and a battery bank of at least 200Ah at 12V (or 100Ah at 24V) to cover cloudy days or overnight usage.
How Many Solar Panels Do You Need?
Using our earlier example of 1,650 Wh/day:
- Assume 5 peak sun hours
- You need: 1,650 ÷ 5 = 330 watts
- Two 200W panels (400W total) give you a comfortable buffer
Always size up slightly — clouds happen.
What Does a DIY RV Solar Kit Really Cost?
This is the million-dollar question, but the answer is more like a thousand-to-several-thousand-dollar answer. The beauty of a DIY setup is that the cost is directly tied to your energy ambitions.
Installing solar on an RV can cost anywhere from a few hundred dollars for a tiny setup to over $15,000 for a professional, top-tier system. But for a DIY RV solar kit that covers essential needs, you’re looking at a much more palatable range.
Here’s a realistic cost breakdown for a typical 400W DIY system with a 100Ah lithium battery:
| Component | Estimated Cost (USD) |
|---|---|
| 400W Solar Panels (e.g., 2x200W) | $350 – $500 |
| 100Ah LiFePO4 Battery | $450 – $700 |
| 40A MPPT Charge Controller | $150 – $250 |
| 1000W Pure Sine Wave Inverter | $150 – $300 |
| Wiring, Fuses, Mounting Hardware | $100 – $200 |
| Total Estimated Cost | $1,200 – $1,950 |
This is a fraction of what a comparable professional installation would cost. And if you start with a smaller 200W kit, you could get your feet wet for well under $1,000.
A Popular DIY RV Solar Kit
To give you a head start, here’s a look at a few popular complete kits that are excellent foundations for a DIY build.
| Product Name | Price Range | Type | |
|---|---|---|---|
 | 100 Watt RV Solar Kit | $299.99 | RV Solar Kits |
 | 200 Watt RV Solar Kit | $399.99 | RV Solar Kits |
 | 300 Watt RV Solar Kit | $599.99 | RV Solar Kits |
 | 400 Watt RV Solar Kit | $699.99 | RV Solar Kits |
 | 600 Watt RV Solar Kit | $899.99 | RV Solar Kits |
 | 800 Watt RV Solar Kit | $1,399.99 | RV Solar Kits |
 | 1200 Watt RV Solar Kit | $1,899.99 | RV Solar Kits |
 | 1600 Watt RV Solar Kit | $2,399.99 | RV Solar Kits |
Why Build Your Own RV Solar System Instead of Buying Pre-Built?
- Cost Savings That Actually Matter
Pre-built RV solar systems installed by dealers can run you $3,000 to $10,000 or more. A well-planned DIY solar setup for your RV can deliver the same performance for $800 to $2,500, depending on your power needs. That’s real money you could spend on more adventures. - Complete Customization
When you go DIY, you’re the architect. Need 400 watts because you work remotely? Done. Running a mini-fridge and a CPAP machine? We’ll size your battery bank accordingly. You’re not stuck with a generic package. - Deeper Understanding of Your System
When something goes wrong on the road (and at some point, it might), knowing your system inside and out means you can troubleshoot and fix it yourself. That knowledge is priceless at 11 PM in a remote campsite.
Complete Solar Power System Kit With Battery Supplier
| Name | Price Range | Details |
|---|---|---|
| SunGoldPower | $5,774 – $31,853.00 | View Collections |
| Rich Solar | $7,999 – $25,99.99 | View Collections |
| ShopSolarKits | $2,539 – $149,989.99 | View Collections |
Maintaining Your DIY RV Solar Kit: Keep It Clean, Keep It Happy
One of the best parts about solar power is how little maintenance it requires. You won’t be changing the oil or replacing spark plugs. For the most part, your system will just sit there and silently do its job for decades.
Your main job is to keep the panels clean. Dirt, dust, bird droppings, and tree sap act like little umbrellas, blocking sunlight and reducing your power output. A good rinse with a hose and a gentle wipe with a soft brush and mild soap every three to six months is usually all that’s needed.
Aim to clean them in the early morning or late evening when they’re cool to prevent thermal shock and water spots. Beyond that, just give all the wiring connections a quick visual inspection once or twice a year to make sure nothing has come loose from road vibrations.
5 Biggest DIY RV Solar Mistakes
Don’t let these common pitfalls derail your project. Forewarned is forearmed!
- Underestimating Energy Needs: This is the #1 rookie error. If you skip the energy audit, you’ll almost certainly buy a system that’s too small. Then you’ll be back to running the generator and feeling frustrated.
- Skimping on the Charge Controller: Using a cheap PWM controller with lithium batteries and high-efficiency panels is like putting a lawnmower engine in a race car. It’ll move, but you’re leaving 30% of your power on the table. Go MPPT.
- Cheaping Out on Wiring: Thin, low-quality wiring creates resistance and voltage drop, which means less power makes it to your battery. Use the correct gauge (usually 10AWG or 8AWG for panel runs) and always, always use fuses.
- Ignoring Shade: Even a small shadow from a vent cover can drastically reduce a panel’s output, especially if they’re wired in series. Plan your layout with shade in mind, and consider a series-parallel wiring configuration for the best overall performance.
- Forgetting the Sealant: This one is terrifyingly easy to do. Drilling holes in your roof is a necessary evil for rigid panels. If you don’t slather every single penetration point with a high-quality RV sealant (like Dicor), you are inviting water damage that can destroy your rig. Don’t skip this step.
Is a DIY RV Solar Kit Worth It in 2026?
Short answer: absolutely yes. Solar panel prices have continued to drop while battery technology has improved dramatically. The break-even point on a solid DIY system versus paying for campsite hookups or fuel for a generator is typically 12–24 months for frequent campers.
And beyond the dollars? There’s something deeply satisfying about living off the grid on energy you harvested yourself. It changes how you think about power — you become conscious of what you use, and you appreciate the quiet that comes without a generator humming.
Conclusion: Your Path to Quiet, Off-Grid Freedom Starts Now
Embarking on a DIY RV solar kit project is more than just a weekend upgrade; it’s an investment in a new way of traveling. It’s the key that unlocks the gate to silent, secluded campsites far from the hum of generators and the expense of hookup fees. It gives you the freedom to chase the horizon without worrying about where you’ll find your next source of power.
While the initial learning curve can feel steep, the process is incredibly rewarding. You’ll gain not only a deeper understanding of your RV’s electrical system but also the confidence and self-reliance that come from building something with your own two hands. So, take a deep breath, do your energy audit, and start gathering your components. The quiet, sun-powered adventures you’ve been dreaming of are waiting just around the corner.
FAQs About DIY RV Solar Kit
How many solar panels do I need for a full-time RV lifestyle?
Most full-timers doing remote work and running a fridge comfortably need between 400W and 800W of solar, paired with 200Ah–400Ah of lithium battery storage. Your actual needs depend on your appliances and how much sun you get in your travel destinations.
Can I install a DIY RV solar kit without any electrical experience?
Yes, many beginners successfully install their first systems with no prior electrical experience. Start with a basic all-in-one kit (like Renogy's starter kits), read the manuals carefully, watch installation videos, and take it step by step. When in doubt, consult a local electrician for the final connections.
What is the lifespan of an RV solar panel?
Most quality monocrystalline solar panels are rated for 25–30 years, with a gradual efficiency decline of about 0.5% per year. Your charge controller, inverter, and wiring may need attention sooner — typically every 5–10 years.
Can I run my RV air conditioner on solar?
It's possible but demanding. A standard RV AC unit draws 1,200–1,800W, which means you'd need at least 800W–1,200W of solar panels and a substantial battery bank (400Ah+ lithium) to run it during the day and for short periods at night. Most solar RVers use fans and ventilation strategies rather than relying on AC.
What's the difference between an MPPT and PWM charge controller for RV solar?
An MPPT (Maximum Power Point Tracking) controller is more efficient — it converts excess panel voltage into additional charging current, recovering up to 30% more energy than a PWM (Pulse Width Modulation) controller. PWM is cheaper and works fine for small systems under 200W where panel and battery voltages are closely matched. For anything larger, MPPT is the smart investment.
Is a flexible or rigid solar panel better for my RV roof?
It depends on your roof type and priorities. Rigid panels are more efficient, durable, and cost-effective but are heavier and require a flat surface and drilling. Flexible panels are lightweight, can conform to curved roofs, and have a low profile, but they are generally less efficient and can have a shorter lifespan due to heat buildup.
Can I expand my DIY RV solar system later on?
Yes, one of the major advantages of a DIY system is its scalability. You can often add more solar panels to your array, as long as you don't exceed the maximum input voltage and amperage of your charge controller. You can also add more batteries to your bank for increased storage capacity. Just be sure to plan for future expansion when choosing your initial charge controller and wiring.
How long will my DIY RV solar system last?
A well-built DIY system using quality components will last for many years. The solar panels themselves are incredibly durable and typically have a 25-year power output warranty. A high-quality LiFePO4 battery can last for 3,000-6,000 cycles, which translates to 10-15 years of regular use. The other components, like the charge controller and inverter, should last for a decade or more.


You Might Also Like


