
The Ultimate Complete Solar Kit for RV: Power Your Adventures Off-Grid in 2026
Whether you’re a weekend warrior or a full-time nomad, a complete solar kit for rv transforms your rig into a self-sufficient rolling haven. In this article, I’ll walk you through everything you need to know—from understanding what’s inside the box to sizing, installation, and the top options on the market—all in plain, no-jargon human speak.
What Exactly Is a Complete Solar Kit for RV?
A complete solar kit RV is a bundled package that contains all the major components required to generate, regulate, store (usually), and sometimes invert solar electricity for your recreational vehicle. Think of it as a meal kit—you get the ingredients pre-portioned, so you don’t have to research every nut and bolt separately. Most kits aim to be “plug-and-play,” though I’ll be honest: you’ll still need some DIY skills or a helping hand.
The Core Components You’ll Find Inside
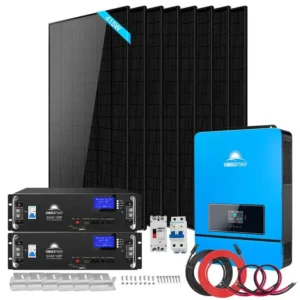
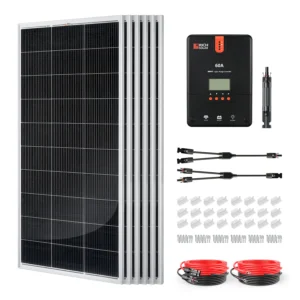
Every reputable complete solar kit for RV includes a few non-negotiables:
- Solar Panels: The sun-catchers. Typically, monocrystalline cells are used these days for higher efficiency.
- Charge Controller: The brain that prevents your batteries from overcharging. You’ll see either PWM or MPPT (more on that soon).
- Wiring and Connectors: UV-resistant cables, MC4 connectors, and often a tray cable for the roof entry gland.
- Mounting Hardware: Brackets, screws, and sometimes tilt mounts for angled sun capture.
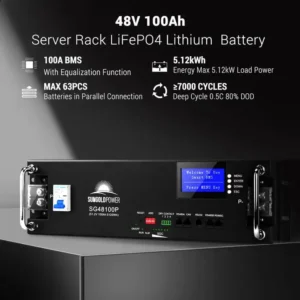
- Battery (Optional but Common): Many advanced kits now include a lithium iron phosphate (LiFePO4) battery as part of a true RV complete solar kit—watch for this because lead-acid is fading fast.
Some deluxe packages even throw in an inverter, a battery monitor, and Bluetooth connectivity. When you unbox a complete solar system for an RV, you should be able to lay everything out on your driveway and say, “Okay, I can do this.”
Why a Complete Kit Beats Buying Pieces Separately
If you’re the type who loves mixing and matching components to squeeze out every last drop of performance, I salute you. But for most of us, the idea of picking a panel from one brand, a controller from another, and then praying the wire gauges match is exhausting. Here’s why a complete solar kit for RV wins:
- Guaranteed Compatibility: The charge controller is already sized for the panel wattage and voltage. No math errors.
- Time Savings: You skip hours of forum scrolling and spec-sheet comparisons.
- Cost Efficiency: Kits are often priced lower than buying parts à la carte—manufacturers leverage bulk packaging.
- Support: One phone call to a single company if something goes sideways, instead of a blame game between three different vendors.
- RV-Specific Engineering: The included brackets and entry gland are designed for the unique challenges of a moving home—vibration, wind uplift, and weather sealing.
I’ve seen too many people cobble together a “deal” only to discover their 30A charge controller can’t handle the array’s amperage. That’s a magic-smoke moment you don’t want. A complete RV solar panel kit takes that stress off your plate.
Types of Complete Solar Kits for RV: Which One Fits Your Rig?
Not all kits are created equal, and your choice depends heavily on your camping style, roof space, and budget. Let’s break down the three main flavors.
1. Roof-Mounted Kits
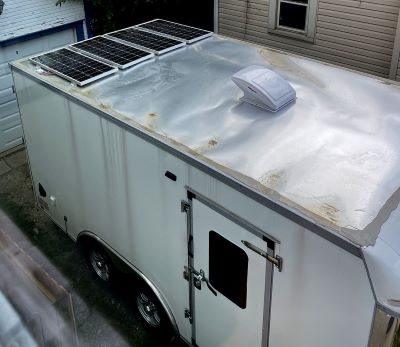 This is the classic RV solar panel kit that bolts permanently to your motorhome or trailer roof. Panels sit flat (or on tilt brackets) and silently top up your batteries whenever the sun shines—even while you’re barreling down the interstate. They’re always working, require zero setup at camp, and don’t eat up your storage bays.
The trade-off? You need a clean, unshaded roof, real estate, and a willingness to drill holes. If you want a true set-it-and-forget-it complete off-grid solar kit for RV, roof-mounted is the gold standard.
2. Portable Suitcase Kits
These foldable panels come in a briefcase-like design. You set them up on the ground, angle them toward the sun, and connect them to your RV’s battery with alligator clips or an external port. Portable kits are a fantastic entry point because you avoid roof penetration entirely.
They’re perfect for RVers who park in the shade but can position the panels in a sunny patch 30 feet away. The downside? You have to deploy and stow them every time you move—and they can walk away if you’re not paying attention. Still, a portable complete solar kit for RV is a stellar solution for renters or anyone with a curved roof that’s tough to mount on.
3. Ground-Deployed Systems
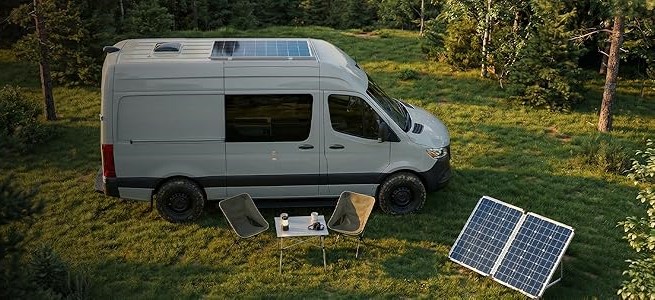
A hybrid between roof and portable, these larger arrays use foldable stands or ground racks. Think of them as mini solar farms you set up next to your campsite. Many full-time boondockers use a ground-deployed complete solar system for rv in tandem with a small roof array.
This approach maximizes harvest without overloading the roof. Just be prepared for a bit more cable management—and pack a mallet for staking down the frame.
How to Size Your Complete Solar Kit for RV
Here’s where I see folks get glassy-eyed. But trust me, sizing a camper solar kit is simpler than doing your taxes.
1. Calculating Daily Power Consumption
Grab a notepad and list every electrical gizmo you use in a 24-hour period: lights, water pump, fridge, fans, laptops, phone chargers, TV, and coffee maker. Multiply each by the hours it runs per day to get watt-hours (Wh). For example, a 12V fridge pulling 5 amps for 10 hours guzzles 600Wh. Add them all up.
A typical couple in a small RV might use 1500–2000Wh per day. A family with an inverter and a residential fridge could easily chew through 4000Wh or more. That daily number is your North Star. Your complete solar kit for RV needs to harvest at least that many watt-hours, factoring in an average of 4 to 5 peak sun hours.
2. Battery Bank Sizing: Lead-Acid vs. Lithium
If your kit doesn’t include a battery, you’ll need to size one. Let’s compare the two main chemistries.
Flooded Lead-Acid: Cheap upfront but heavy, requires maintenance, and you can only use 50% of the rated capacity without shortening their life drastically. To supply 2000Wh of usable energy, you’d need a 4000Wh (333Ah at 12V) bank.
Lithium Iron Phosphate (LiFePO4): Lighter, lasts 10+ years, and you can safely drain 80–100% of the rated capacity. For the same 2000Wh, a 200Ah LiFePO4 battery does the job—and it’s half the weight. Most premium RV complete solar kits with lithium battery options now center around LiFePO4 because the long-term cost per cycle is far lower. The data from 2024 shows lithium prices have dropped by nearly 30%, making them the no-brainer choice for new installations.
Key Features to Look for in a Complete RV Solar Kit
Not all kits are born equal, and the alphabet soup on spec sheets can be dizzying. Let’s translate what actually matters.
1. High-Efficiency Monocrystalline Panels
Polycrystalline panels are still floating around in some budget kits, but I’d steer clear. Monocrystalline cells convert more sunlight per square foot—critical when roof space is at a premium. Look for panels with an efficiency rating above 20%. A complete RV solar kit that ships with top-tier mono panels will squeeze every last ray from that sunny boondocking spot.
2. MPPT vs. PWM Charge Controllers
This decision can make or break your system’s performance. I’ll lay it out in a no-nonsense table.
| Feature | MPPT (Maximum Power Point Tracking) | PWM (Pulse Width Modulation) |
|---|---|---|
| Efficiency | 93–97% harvesting | 70–80% harvesting |
| Performance in Cloud | Excels; pulls maximum watts even in low light | Drops significantly |
| Voltage Flexibility | Handles higher panel voltages; great for series wiring | Needs panel voltage close to battery voltage |
| Cost | Higher upfront | Budget-friendly |
| Best For | Larger arrays (200W+), lithium batteries, full-time living | Small systems (under 200W), weekend trips, tight budgets |
If your complete solar kit for RV includes an MPPT controller, you’re golden. It’s a bit like having a smart transmission in your car—it keeps the engine (panels) in the sweet spot regardless of the road conditions. PWM, on the other hand, works but leaves watts on the table. For a modern RV solar panel kit, MPPT is the standard I recommend.
3. Inverter Technology: Pure Sine Wave Is a Must
If you plan to plug in a laptop, TV, CPAP machine, or any sensitive electronics, you need a pure sine wave inverter. Modified sine wave inverters are cheaper, but they can cause buzzing, overheating, or even damage to delicate gear.
Many complete solar systems for RVs now bundle a pure sine wave inverter or at least include a pre-wired inverter circuit. Check the continuous wattage rating: a 2000W unit lets you run a microwave or a hair dryer without tripping things.
4. Battery Chemistry: Why LiFePO4 Is Taking Over
Remember when lithium batteries were exotic and terrifyingly expensive? That era is over. A complete RV solar kit with a lithium battery is no longer a luxury; it’s the smart money move. LiFePO4 packs are inherently safe (no thermal runaway like other lithium types), boast built-in battery management systems (BMS), and charge faster.
They also maintain voltage like a champ—no more watching your lights dim as the battery depletes. When you shop for a complete solar kit for an RV in 2026, make sure the battery has low-temperature protection. Charging a lithium battery below freezing without it can brick the cells, and that’s a crying shame.
Comparing the Best Complete Solar Kits for RVs
Here’s where the rubber meets the road. I’ve assembled a comparison of four popular complete solar kits for RVs that span from entry-level to premium. Prices are ballpark as of early 2025.
| Kit Model (Example) | Panel Wattage | Battery Included? | Charge Controller | Inverter | Approx. Price | Best For |
|---|---|---|---|---|---|---|
| WindyNation 200W Starter Kit | 200W Poly | No (battery sold separately) | 30A PWM | No | $350–$400 | Weekend campers, small trailers |
| Renogy 400W Premium Monocrystalline Complete Kit | 400W Mono | No (works with any battery) | 40A MPPT with Bluetooth | Optional add-on | $800–$950 | Couples boondocking, medium RVs |
| Go Power! Solar Extreme 300W Kit | 300W Mono | 100Ah LiFePO4 included | 30A MPPT | 1500W Pure Sine | $2,400–$2,700 | Full-timers wanting a single-box solution |
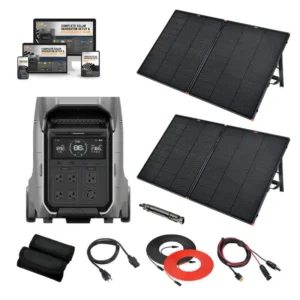
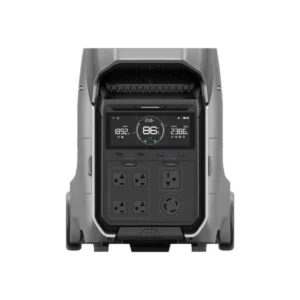
| EcoFlow Power Kit 5kWh | 400W flexible Mono | 5kWh LFP power hub (battery+inverter+controller all-in-one) | Integrated MPPT | 3600W Pure Sine | $6,000–$7,000 | Luxury motorhomes, all-electric setups |
Each of these represents a different philosophy. The WindyNation kit is a simple, no-frills RV solar panel kit that gets your feet wet. The Renogy 400W is a perennial favorite among DIYers—a robust, complete solar kit for an RV with expandability.
Go Power! targets those who want a factory-matched lithium battery inside the box. And EcoFlow’s Power Kit is a space-age, complete RV solar kit that consolidates everything into a sleek power hub, almost like having a Tesla Powerwall for your RV. Choose based on your energy appetite and how many creature comforts you refuse to surrender.
Most Popular
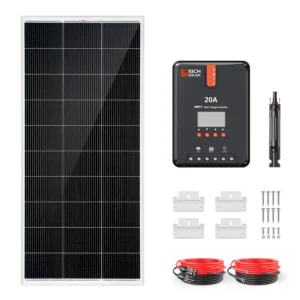
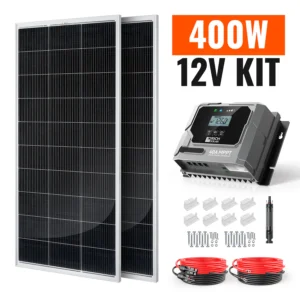
400 Watt RV Solar Kit
For getting started
$699.99
2 x 200 Watt Monocrystalline Solar
- 1 x 40A MPPT Solar Charge Controller
- Generates 10.9 amps of power
- Excellent low-light performance
- Fast and easy installation
Most Popular
600 Watt RV Solar Kit
Best for most users
$899.99
3 x 200 Watt Monocrystalline Solar Panel
- 1 x 40A MPPT Solar Charge Controller
- Built with strong, high transmission
- Fast and easy installation
- 25-year limited warranty for power output
Most Popular
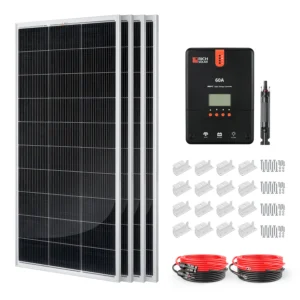
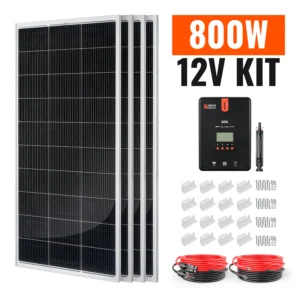
800 Watt RV Solar Kit
For traveling enthusiast
$1,399.99
4 x 200 Watt Monocrystalline Solar Panel
- 1 x 60A MPPT Solar Charge Controller
- charges 12-volt batteries
- Fast and easy installation
- 25-year limited warranty
Comparing the Contenders: Top Complete Solar Kit for RV
To give you a real-world look at what’s out there, here’s a comparison of a few standout systems that range from a starter setup to a full-on, power-everything beast. These aren’t just panels; they are a true, complete solar kit for RV packages.
| Model | System Wattage | Battery Type | Key Features | |
|---|---|---|---|---|
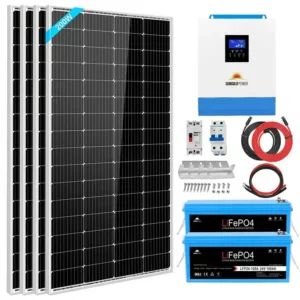
| 1600 Watt RV Solar Kit | 1600 Watt Solar Input | 400AH 24V battery bank | Generates 10.9 amps of power, charges 12-volt batteries, has 3′ quick-connect cables with connectors, and works in series or parallel. | RV Solar Kits |
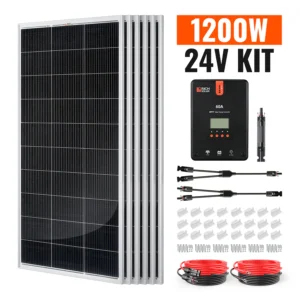
| 1200 Watt RV Solar Kit | 1200 Watt Solar Input | Compatible with various deep-cycle battery options | Automatically detects 12V/24V/36V/48V DC system voltages. | RV Solar Kits |
| 800 Watt RV Solar Kit | 800 Watt Solar Input | Compatible with various deep-cycle battery options | Fast and easy installation thanks to 14 pre-drilled holes; compatible with standard Z-brackets, ground mounts, side pole mounts, and tilt mounts. | RV Solar Kits |
| 600 Watt RV Solar Kit | 600 Watt Solar Input | 100AH 12V Lithium batteries | Built with strong, high-transmission “anti-reflective” coated tempered glass and an anodized aluminum frame. | RV Solar Kits |
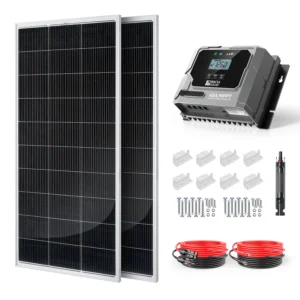
| 400 Watt RV Solar Kit | 400 Watt Solar Input | 200AH 12V Lithium battery | High-quality components that work seamlessly together. | RV Solar Kits |
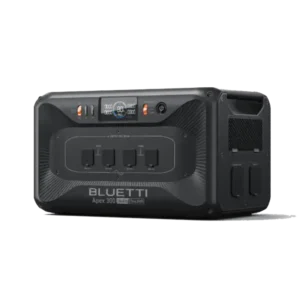
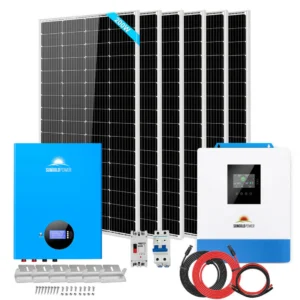
| BLUETTI RVSolar 48V System | Up to 3,000W Solar Input | Expandable B4810 48V LiFePO4 (up to 122kWh total!) | 5-in-1 power hub, 30-minute install, IP65-rated batteries, AI diagnostics. The futuristic, luxury option. | Tech enthusiasts and luxury RV owners want maximum power and seamless integration. |

DIY Installation: A Step-by-Step Guide to Setting Up Your Complete Solar Kit
I won’t sugarcoat it: installing a complete solar kit for an RV requires basic electrical know-how and respect for safety. But you can absolutely do it over a weekend.
1. Mounting the Panels Securely
First, plan your layout on the roof, avoiding vents, skylights, and air conditioner shadows. Mark the bracket holes, apply a generous dollop of Dicor self-leveling lap sealant, and screw the brackets into the roof trusses if possible. Never mount panels only into the thin plywood skin—find the rafters.
Tighten everything down, then seal every screw head and cable entry. A roof leak is a far bigger nightmare than a dead battery. If your complete RV solar kit includes tilt mounts, now’s the time to install them, though you might sacrifice some clearance.
2. Wiring the Charge Controller and Batteries
Run the panel cables through the roof entry gland (sealed, of course) down to your charge controller location—usually near the battery bank. Keep the cable run short to minimize voltage drop. Connect the battery to the controller first (so it powers up and recognizes the voltage), then connect the solar input.
This sequence prevents controller damage. Use appropriately sized fuses or breakers on both the panel and battery sides. A good, complete solar kit for RV includes a wiring diagram; treat it like a treasure map.
3. Connecting the Inverter and AC Distribution
If your kit includes an inverter or you’ve added one, mount it within a few feet of the battery bank using heavy-gauge cables. Connect a fuse or DC breaker between the battery positive and the inverter. For a permanent installation, wire the inverter’s AC output to a transfer switch or directly to a dedicated outlet.
Some RVers simply plug their shore power cord into the inverter (with a proper adapter), but consult an electrician if you’re not comfortable. Safety first—always disconnect all power sources before making connections.
Maintenance Tips to Keep Your RV Solar Kit Performing
Solar panels are blissfully low-maintenance, but neglect can chip away at your harvest. Every couple of months, wash the panels with a soft brush and mild soap—bird droppings and dust can drop output by 10–15%. Check cable connections for corrosion, especially if you’re near the coast.
Tighten battery terminals, and if you have flooded lead-acid batteries, top off the water with distilled water. For LiFePO4, periodically review the BMS app for cell balance. A complete solar kit for RV that’s treated kindly will serve you faithfully for a decade or more.
Common Mistakes to Avoid When Buying a Complete Solar Kit for an RV
I’ve witnessed some head-scratchers over the years. Learn from other people’s oops moments.
- Underestimating Power Needs: Buying a 100W kit when you really need 400W. You’ll end up running the generator anyway. Measure twice, buy once.
- Ignoring Roof Weight Limits: Those heavy glass panels add up. Check your RV’s cargo carrying capacity.
- Skipping the Battery Upgrade: Adding solar to a tired, sulfated battery is like pouring water into a leaky bucket.
- Choosing PWM for a Large Array: It may save you $150 now, but you’ll lose far more in foregone energy over the years.
- Not Verifying Lithium Compatibility: If your RV’s converter/charger isn’t lithium-aware, your new complete rv solar kit with lithium battery might not charge properly from shore power. You may need a converter upgrade.
- Forgetting Winterization: If you store your RV in freezing temps, either remove the lithium battery or ensure the BMS has a low-temp cutoff.
Future-Proofing Your Solar Setup: Expandability and Smart Monitoring
The beauty of a modular complete solar kit for RV is that you can start small and grow. Look for kits with an MPPT controller that has headroom—say, a 40A controller with a 400W panel but capable of 520W at 12V. That way, adding a portable panel later won’t require a costly controller swap.
Bluetooth monitoring is a feature I can’t live without. Being able to glance at your phone and see exactly how many amps are flowing in real time turns you into an energy ninja. You’ll know when to tilt the panels, when to run the generator, and whether that extra hour of Starlink use really mattered.
Conclusion: Is a Complete Solar Kit for RV Right for You?
By now, you can probably tell I’m a huge fan of the complete solar kit for RV approach. It strips away the complexity of building a system from scratch, yet still offers the satisfaction of DIY installation and the freedom of silent, fuel-free power.
Whether you choose a compact 200W suitcase kit for weekend escapes or a full-tilt 400W lithium powerhouse for full-time living, the end result is the same: more boondocking, less generator guilt, and a deeper connection to the places you explore.
The technology has matured so much that 2025 feels like a turning point. Prices are down, efficiency is up, and the myth that solar is only for tech wizards has been thoroughly busted. If you’re ready to take the plunge, measure your energy appetite, pick a complete solar kit for RV that matches, and give yourself permission to camp outside the lines. The sun’s been waiting for you.
FAQs About Complete Solar Kit RV
You certainly can, but I’d recommend buddying up with someone who’s comfortable with a multimeter. Most kits come with detailed instructions, and there are countless video walkthroughs. Just respect DC electricity, triple-check polarities, and don’t rush. If wiring the inverter into your RV’s AC panel gives you pause, hire a certified RV technician for that final step.
It varies wildly. Entry-level kits often have one to two panels totaling 100–200W, while robust off-grid kits pack four or more panels for 400W to over 800W. The number matters less than the total wattage. A single high-voltage residential-style panel can sometimes outperform multiple small panels if your charge controller can handle it.
In most cases, no—at least not for long. A typical RV air conditioner draws 1200–1500 watts continuously. You’d need a massive battery bank (600Ah lithium or more), a large array (800W+), and a beefy inverter. Some rigs can run a high-efficiency A/C for a few hours on a well-designed system, but full-day air conditioning off-grid remains the holy grail. Soft starters help reduce the initial surge.
It depends on your consumption and weather. Many full-timers treat the generator as backup insurance for cloudy stretches or when they need to run the microwave and hair dryer simultaneously. With a properly sized complete solar kit for rv and lithium batteries, some RVers go months without firing up the genny. If you boondock exclusively in sunny climates, you might never need it.
Absolutely. The panels are designed to withstand hail, rain, and highway-speed winds. All quality kits include UV-resistant cables and weatherproof MC4 connectors. The roof entry gland, when properly sealed with lap sealant, creates a watertight barrier. Just do a visual inspection every few months to ensure the sealant hasn’t cracked.
You Might Also Like